Notice RING DOOR VIEW
Liens commerciaux


Le mode d'emploi RING DOOR VIEW vous rend service
Vous aimeriez savoir comment configurer l'accès à distance de votre caméra IP. Vous ignorez comment améliorer la qualité d'image de votre caméra IP. Vous ignorez comment sécuriser l'accès à votre caméra IP pour éviter les intrusions. Vous aimeriez savoir comment enregistrer les vidéos de votre caméra IP sur un serveur distant. Vous ignorez comment mettre à jour le firmware de votre caméra IP pour bénéficier des dernières fonctionnalités. Vous voulez savoir comment configurer la détection de mouvement de votre caméra IP pour être alerté en cas d'intrusion. Vous vous demandez comment accéder au flux vidéo en direct de votre caméra IP depuis votre smartphone. Vous aimeriez savoir comment choisir le bon emplacement pour installer votre caméra IP et obtenir une surveillance optimale. Vous vous demandez comment configurer correctement votre caméra IP pour une surveillance optimale. Vous ignorez comment régler la qualité de l'image de votre caméra IP pour obtenir une meilleure résolution. Vous ignorez comment activer la fonction de détection de mouvement sur votre caméra IP pour être alerté en cas d'activité suspecte. Vous vous demandez comment enregistrer les images de votre caméra IP sur un serveur externe pour les sauvegarder en cas de besoin. Vous aimeriez savoir comment mettre à jour le firmware de votre caméra IP pour bénéficier des dernières fonctionnalités et améliorations de sécurité. - Pour configurer la caméra ip RING DOOR VIEW, consultez la notice fournie. - Pour toute question sur l'installation de la caméra IP, consultez la notice. - Pour régler la qualité de l'image de la caméra IP, consultez la notice. - Pour mettre à jour le logiciel de la caméra IP, consultez la notice. Vous ignorez comment configurer votre caméra IP pour la vision à distance. Vous voulez savoir comment améliorer la qualité de l'image de votre caméra IP. Vous aimeriez savoir comment sécuriser l'accès à votre caméra IP. Vous ignorez comment enregistrer les vidéos de votre caméra IP. Vous aimeriez savoir comment régler la sensibilité de détection de mouvement de votre caméra IP. Vous aimeriez savoir comment mettre à jour le firmware de votre caméra IP. Vous ignorez comment configurer votre caméra IP pour accéder à distanc eaux images enregistrées. Vous ignorez comment régler la sensibilité des mouvements de votre caméra IP pour éviter les fausses alertes. Vous voulez savoir comment mettre à jour le logiciel de votre caméra IP pour bénéficier des dernières fonctionnalités. Vous voulez savoir comment améliorer la qualité de l'image de votre caméra IP en cas de vision nocturne. Vous voulez savoir comment protéger l'accès à distance à votre caméra IP avec un mot de passe sécurisé. Vous aimeriez savoir comment installer une carte SD dans votre caméra IP pour enregistrer les vidéos en local. Vous ignorez comment configurer les notifications d'alerte sur votre smartphone en cas de mouvement détecté par votre caméra IP. - Pour configurer la caméra ip RING DOOR VIEW, consultez la notice. - Assurez-vous de bien brancher la caméra IP avant de l'utiliser. - Pour améliorer la qualité de l'image, ajustez les paramètres de la caméra IP. - Pour enregistrer des vidéos, insérez une carte mémoire dans la caméra IP. - Pour visionner les images en direct, connectez-vous à l'application mobile dédiée. - Pour une installation facile, suivez attentivement les instructions fournies dans la notice.
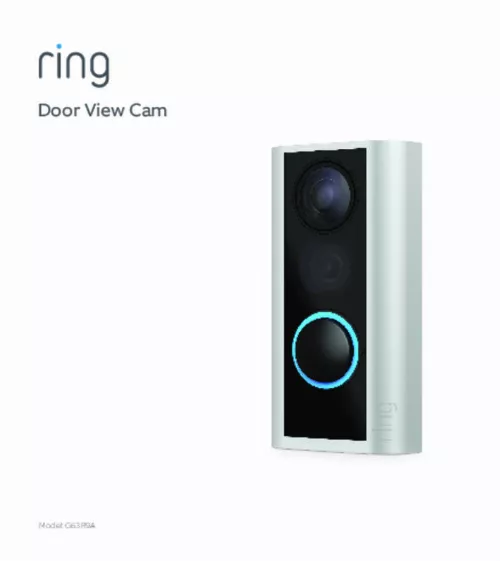
Extrait du mode d'emploi RING DOOR VIEW
Téléchargez votre notice ! Téléchargement gratuit et sans inscription de tous types de documents pour mieux utiliser votre caméra ip RING DOOR VIEW : mode d'emploi, notice d'utilisation, manuel d'instruction. Cette notice a été ajoutée le Lundi 1 Janvier 2020.
