Notice RAZOR E300S
Liens commerciaux


Le mode d'emploi RAZOR E300S vous rend service
Vous voulez savoir comment prolonger l'autonomie de votre trottinette électrique. Vous aimeriez savoir comment réparer une crevaison sur votre trottinette électrique. Vous ignorez comment entretenir votre trottinette électrique pour qu'elle dure plus longtemps. Vous voulez savoir comment choisir la meilleure trottinette électrique en fonction de vos besoins. Vous vous demandez comment régler les freins de votre trottinette électrique pour une meilleure sécurité. Vous vous demandez comment transporter facilement votre trottinette électrique lors de vos déplacements. Vous voulez savoir comment nettoyer efficacement votre trottinette électrique pour la garder en bon état. Vous vous demandez comment optimiser les performances de votre trottinette électrique en hiver. Vous aimeriez savoir s'il est possible de remplacer la batterie de votre trottinette électrique ? Vous vous demandez s'il est nécessaire de porter un casque lors de l'utilisation de votre trottinette électrique ? Vous ignorez s'il est possible de personnaliser votre trottinette électrique avec des accessoires ? - Pour régler la vitesse de la trottinette électrique RAZOR E300S, consultez la notice. - Pour plier et déplier la trottinette électrique, suivez les instructions indiquées dans la notice. - Pour recharger la batterie de la trottinette électrique, branchez le chargeur fourni dans une prise électrique. - Pour vérifier la pression des pneus de la trottinette électrique, utilisez un manomètre. - Pour activer les feux avant et arrière de la trottinette électrique, utilisez l'interrupteur prévu à cet effet. Vous voulez savoir comment prolonger la durée de vie de la batterie de votre trottinette électrique. Vous aimeriez savoir quelles sont les précautions à prendre pour rouler en toute sécurité avec votre trottinette électrique. Vous vous demandez comment entretenir votre trottinette électrique pour évietr les pannes et les dysfonctionnements. Vous vous demandez s'il est possible de personnaliser votre trottinette électrique avec des accessoires. Vous voulez savoir comment régler la vitesse de votre trottinette électrique pour l'adapter à vos besoins. Vous ignorez quelles sont les règles à respecter en matière de stationnement de votre trottinette électrique. Vous aimeriez savoir comment transporter facilement votre trottinette électrique lorsque vous ne l'utilisez pas. Vous vous demandez s'il est nécessaire d'assurer votre trottinette électrique et quelles sont les garanties proposées. Vous vous demandez comment prolonger la durée de vie de la batterie de votre trottinette électrique. Vous voulez savoir comment entretenir et nettoyer correctement votre trottinette électrique. Vous vous demandez comment régler les freins de votre trottinette électrique. Vous ignorez comment vérifier la pression des pneus de votre trottinette électrique. Vous vous demandez comment sécuriser votre trottinette électrique lorsqu'elle est stationnée à l'extérieur. - Suivez les instructions de la notice pour une utilisation sécurisée de la trottinette électrique RAZOR E300S. - Assurez-vous de charger complètement la batterie avant de l'utiliser. - Vérifiez régulièrement l'état des pneus pour éviter tout risque de crevaison. - Respectez les limitations de vitesse indiquées pour votre sécurité et celle des autres usagers de la route. - Nettoyez régulièrement votre trottinette électrique pour assurer son bon fonctionnement. - N'oubliez pas de porter un équipement de protection lorsque vous utilisez votre trottinette électrique. - Rangez votre trottinette électrique dans un endroit sec et à l'abri de l'humidité lorsque vous ne l'utilisez pas.
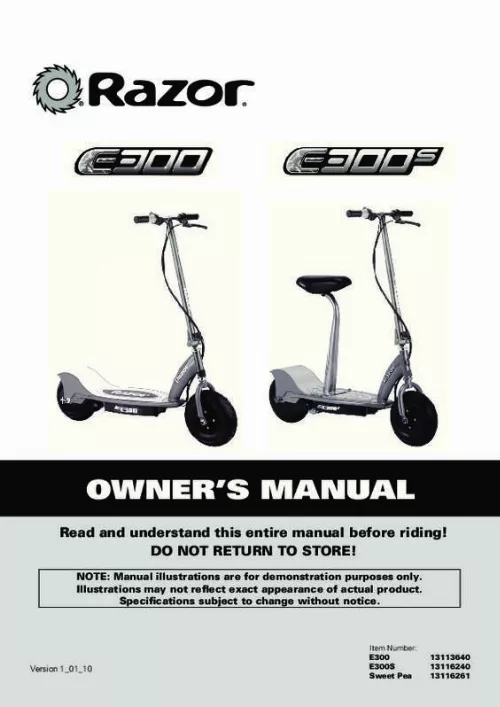
Extrait du mode d'emploi RAZOR E300S
Les instructions détaillées pour l'utilisation figurent dans le Guide de l'utilisateur.
WARNING: Keep your fingers clear of the pivoting mechanism when folding or unfolding the scooter, and make sure others are standing clear. Note: The cable and wire assembly from the handlebar must not wrap around the steering tube or handlebar as shown in step 3. Sharp bends or twisting of the brake cable can cause the brakes to malfunction. 1 Loosen the locking knob and swing to the 6 o’clock position to unfold the handlebar. 2 Remove the plastic protector covering the base of the handlebar assembly. Insert the “quill” part of the handlebar assembly into the fork. You may have to loosen the wedge to allow it to slip into the fork. 3 Slide the quill into the fork until it bottoms on the headset. 4 Using a 6mm hexagonal key wrench, tighten the wedge by turning the bolt clockwise. The wedge is properly tightened when the handlebars cannot be twisted out of alignment with the front wheel. q Inflating the Tires Rear Tire 5 Pivot the handlebar assembly upright. 6 Swing the locking knob to the 12 o’clock position and tighten by hand as firmly as possible. Tires are inflated when shipped, but they invariably lose some pressure between the point of manufacturing and your purchase. Always inflate tires to the correct PSI before first time use. WARNING: Failure to remove the valve adapter after inflating will cause the inner tube and/or adapter to be severed by the rear drive sprocket. Note: If you lose the valve extender, one can be purchased at almost any auto parts store. Note: The pressurized air supplies found at gasoline stations are designed to inflate high-volume automobile tires. If you decide to use such an air supply to inflate your electric scooter tires, first make sure the pressure gauge is working, then use very short bursts to inflate to the correct PSI. If you inadvertently over-inflate the tire, release the excess pressure immediately. 1 Use the valve extender located inside the end of the right handlebar grip. 2 Open the round cover located on the chain cover by sliding the cover upward. Align the opening in the drive sprocket with the valve stem. Thread the adapter completely onto the valve stem and attach the pump. Inflate to the PSI indicated on the tire sidewall. 3 3 Remove valve extender immediately after inflating and close the round cover. [...] Do not exceed charging time. Always disconnect from the charger prior to wiping down and cleaning your scooter with liquid. FAILURE TO USE COMMON SENSE AND HEED THE ABOVE WARNINGS INCREASES RISK OF SERIOUS INJURY. USE WITH APPROPRIATE CAUTION AND SERIOUS ATTENTION TO SAFE OPERATION. 1 Before You Begin Remove contents from box. Remove the foam separators that protect the components from damage during shipping. Inspect the contents of the box for scratches in the paint, dents or kinked cables that may have occurred during shipping. Because the scooter is 95 percent assembled and packed at the factory, there should not be any problems, even if the box has a few scars or dents. WARNING: DO NOT USE NONRAZOR PRODUCTS WITH YOUR RAZOR ELECTRIC SCOOTER. The scooter has been built to certain Razor design specifications. The original equipment supplied at the time of sale was selected on the basis of its compatibility with the frame, fork and all other parts. Certain aftermarket products may or may not be compatible. MAKE SURE POWER SWITCH IS TURNED “OFF” BEFORE CONDUCTING ANY ASSEMBLY OR MAINTENANCE PROCEDURES. Estimated Assembly and Set-Up Time Charger Allow up to 20 minutes for assembly, not including initial charge time. Allow up to 18 hours for initial charge (see page 3 for charging information) Brake Lever Charger Port Charger Plug Valve Extender (inside grip) Twist Grip Throttle Seat (if applicable) Handlebar Stem -On/Off Switch -Charger Port -Reset Button Folding Mechanism Limiter Front Fork -Battery -Motor -Control Module Required Tools 6mm key wrench 8mm/10mm/17mm (Included) wrenches 4mm key wrench (Not Included) (Included) (300S ONLY) 2. 5mm/5mm key wrenches (Not Included) Phillips screw driver (Included) (300S ONLY) Valve extender (Located in right handlebar grip) Bicycle-style tire pump for Schrader valve tires, with pressure gauge (Not Included) Need Help? Visit our web site for replacement parts, product support and a list of authorized service centers at www. razor. com or call toll-free at 866-467-2967 Monday - Friday 8:00AM - 5:00PM Pacific Time. 2 Assembly and Set-Up q Attaching the Handlebars Note: Make sure the cables/ wires are out of the way before inserting the stem in the fork. WARNING: Failure to properly tighten the wedge may allow the handlebars to dislodge while riding and may cause you to lose control and fall. [...]..
Téléchargez votre notice ! Téléchargement gratuit et sans inscription de tous types de documents pour mieux utiliser votre trottinette électrique RAZOR E300S : mode d'emploi, notice d'utilisation, manuel d'instruction. Cette notice a été ajoutée le Lundi 1 Janvier 2020.