Mes Notices

600 000 notices et 900 000 pièces détachées électroménager

Notice ONKYO LS5200

Télécharger la notice

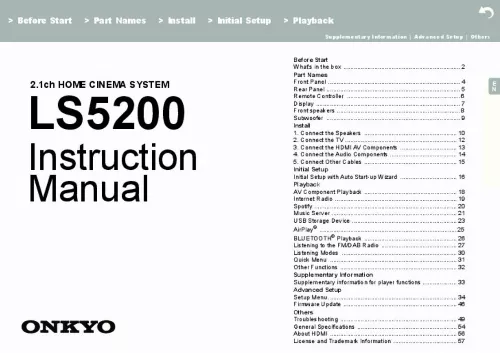
Extrait du mode d'emploi ONKYO LS5200

Les instructions détaillées pour l'utilisation figurent dans le Guide de l'utilisateur.

It will flash if the connection to the network is not correct. DIGITAL: Digital signals are input and the digital input selector is selected. Lights when operating the "NET" or "USB" input selector indicating remote controller cursor operations are possible in screens showing list of tracks, for example. Lights when headphones are connected. Lights when operating the "NET" or "USB" input selector when tracks are played or paused. Lights according to the type of input digital audio signals and the listening mode. Lights in the following conditions. RDS: Receiving RDS broadcasting. AUTO: When FM tuning mode is auto. TUNED: Receiving FM radio. FM STEREO: Receiving FM stereo. SLEEP: Sleep timer has been set. ASb: When Auto Standby function is enabled. ( P44) 7. Flashes when muting is on. Displays various information of the input signals. Characters that cannot be displayed on this unit are replaced with asterisks ( * ). 7 > Before Start > Part Names > Install > Initial Setup > Playback Supplementary Information | Advanced Setup | Others Front speakers E N      1 2 There is no distinction between left and right with the included speaker system. There will be no difference in sound quality whichever side you choose to put each speaker. Tweeter: Plays the mid range and treble. Woofer: Plays the bass. Grill net fittings: Used to attach the grill nets. When removing the grill net, hold the top of the grill net and pull gently forward, then gently pull the bottom of the grill out to remove. To attach the grill net, match the four pins on the grill net to the fittings, then press into place. Screw hole for fitting wall mount bracket (M5): Use this to attach the wall mount bracket. ( P11) 5. Speaker terminals: Connect speakers to the main unit with the supplied speaker cables. 8 > Before Start > Part Names > Install > Initial Setup > Playback Supplementary Information | Advanced Setup | Others Subwoofer E N    1. LINK LED: Lights when paired with the main unit. LINK button: Used to pair the subwoofer and the main unit. AC INLET: The supplied power cord is connected. The wireless connection setting between the subwoofer and the main unit was completed at the time of shipping. You need only connect the power cord to start using the unit. [...] Power cord 7. ETHERNET port: Connect to the network with an Ethernet cable. HDMI OUT jack: Connect a HDMI cable to transfer video signals and audio signals to a TV. HDMI IN jacks: Input video signals and audio signals with a HDMI cable connected to an AV component. SPEAKERS terminals: Connect speakers with the supplied speaker cables. SUBWOOFER PRE OUT jack: Connect a powered subwoofer with a subwoofer cable. 5 > Before Start > Part Names > Install > Initial Setup > Playback Supplementary Information | Advanced Setup | Others Remote Controller         1. Í button: Turns the unit on or into standby mode. Input selector buttons: Switches the input to be played. Q (QUICK MENU) button: You can perform common settings on the TV screen. ( P31) 4. Cursors, ENTER button: Select the item with the cursors and press ENTER to confirm. button: Displays the Setup menu. ( P34) 6. Volume buttons: Allows you to adjust the volume. This button also cancels the muting. button: Temporarily mutes audio. Press again to cancel muting. Listening mode buttons: Allows you to select the listening mode. ( P30) 9. Play buttons: You can start play of the Music Server or USB. button: You can start repeat or random play of the Music Server or USB. CLEAR button: Deletes all characters you have entered when entering text on the TV screen. DIMMER button: You can adjust the brightness of the display in three steps. It cannot be turned off completely. button: Switches the information on the display. button: Returns the display to the previous state during setting. MODE button: Switches tuning to an FM station between automatic tuning and manual tuning. MEMORY button: Used to register FM/DAB radio stations. E N      30° 30° Approx. 5 m (16 ft. )   6 > Before Start > Part Names > Install > Initial Setup > Playback Supplementary Information | Advanced Setup | Others Display       E N Neo:6  1. Lights in the following conditions. HDMI: HDMI signals are input and selected. ARC: Audio signals from the ARC compatible TV are input and selected. USB: When "USB" is selected with the input selector and the unit is connected by USB and the USB device is selected. Flashes if the USB is not properly connected. [...]..

Téléchargez votre notice ! Téléchargement gratuit et sans inscription de tous types de documents pour mieux utiliser votre chaîne hifi ONKYO LS5200 : mode d'emploi, notice d'utilisation, manuel d'instruction. Cette notice a été ajoutée le Samedi 4 Avril 2019.

Le mode d'emploi ONKYO LS5200 vous rend service

Votre chaine hifi se bloque dès la mise sous tension en affichant la mention: Protection, puis son écran s'éteint de lui même sans que vous ne puissiez accéder à son menu de paramétrage. Le manuel de votre ONKYO LS5200 vous aidera à désactiver le mode de protection des commandes de votre chaine hifi en effectuant une simple pression sur la touche reset située à l'arrière de votre appareil. Depuis que vous avez changé de pièce votre chaine hifi, cette dernière n'est plus en mesure de vous faire écouter la radio, en effet vous n'entendez que des grésillements à la place des fréquences qui sont enregistrées dans sa mémoire. Vous ne parvenez pas à enregistrer plus de trois fréquences de radio dans la mémoire de votre chaine hifi, pourtant elle peut théoriquement en retenir trente. La notice de votre ONKYO LS5200 vous expliquera la marche à suivre pour mémoriser les fréquences d'un nombre conséquent de programmes de radio dans la base de données de votre appareil.

Liens commerciaux