Mes Notices

600 000 notices et 900 000 pièces détachées électroménager

Notice HUSQVARNA 1200

Télécharger la notice

Extrait du mode d'emploi HUSQVARNA 1200

Les instructions détaillées pour l'utilisation figurent dans le Guide de l'utilisateur.

Action Remove any fabric dressing which may have fastened under the thread tension spring. Damaged thread tension spring is to be exchanged. Comments Deposits from fabric or thread can fasten on the spindle of the hook. In that case the spindle should be carefully cleaned with the brush in the accessory box. At the same time make sure that pieces which may have become wound around the spindle are removed. Thread tension of the bobbin case, (P. The hook cover Requirements The inside of the hook cover must not be damaged. Action Damaged hook cover must be exchanged. Regarding the gap between the hook cover and the driver, (P. Comments The inside of the hook cover forms a support for the hook and the bridge above the finger of the bobbin case supports the thread, so that the thread loop is formed on the correct side of the needle. SEWKNITWORLD 104 72 30-26 Husqvarna service manual 9 The hook Requirements The tip of the hook (A) and surface (B) must not be damaged. Action Exchange the damaged hook. The driver Requirements The surface of the driver against the hook must not be damaged, worn or uneven in any way which might hinder the passage of the thread. Action Damaged hook is to be exchanged (P. The main switch and feed dip button If the main switch or the feed dip button doesn’t work satisfactorily, remove the rear cover and front panel, (P. Exchange the complete unit or spring (A). 10 Husqvarna service manual 104 72 30-26 SEWKNITWORLD The foot control Requirements 1 The speed should be continuously controllable from the lowest r/min to full speed. Action Test the foot control on a machine that is known to operate properly. If it does not work, exchange the whole control, alternatively the cord device or the potentiometer. Requirement 2 The cable should be easily extractable from the cord device of the foot control and after pulling the cable slightly it should be rewound on the cord device. Action The foot control or the cord device are to be exchanged. Dismantling (P. The foot control Requirements The speed should be continuously controllable from the lowest r/min to full speed. Action Test the foot control on a machine that is known to operate properly. If it does not work, exchange the whole control, alternatively the potentiometer. Dismounting (page 49). [...] Fixed spanner 5mm to set the stitch plate in relation to the needle (P. No 411 85 98-01 3. Fixed spanner 5,5mm for the sidewards setting of the feed dog (P. No 411 54 31-01. Adam keys: -0. 9mm for the timing of the step motor of the thread tension (P. No 412 27 71-01. -1,5mm for needle clamp and step motors. No 411 66 89-01. -2,5mm for the timing of the hook in relation to the needle (P. 30) and for the gap between the hook cover and the driver (P. No 411 86 01-01. Shortened adam key 2,5mm for the setting of the presser foot (P. 25) and of the needle in relation to the presser foot (P. No 412 27 65-01. Key to set the stitch length balance (P. 36-40). No 412 27 66-01. Magnetic screwdriver with two separate heads. No 411 54 33-01. Screwdriver Torx 10 Ref. No 412 36 48-01. Screwdriver Torx 20 Ref. No 412 36 49-01. Screwdriver Torx 25 Ref. No 412 36 50-01. Angle key for Torx 6 Ref. No 412 27 67-01. Wristband for ESD Ref. No 412 23 02-01. Extractor tool (p. No 412 27 98-01. SEWKNITWORLD 104 72 30-26 Husqvarna service manual 7 VISUAL CONTROL OF DETAILS Stitch plate Requirements The stitch plate must not be damaged in any way. Particular attention should be paid to possible damage or unevenness around the needle hole. Action Exchange the damaged stitch plate. Mounting of a new stitch plate In order to get the stitch plate into the correct position it should be first mounted with the spring (A) and screws (B) somewhat loose. Thereafter remove the stitch plate, fasten the screws an remount the stitch plate. Setting to needle, (P. Presser foot Requirements There should be no scratches on the underneath of the presser foot. Action Exchange a damaged presser foot. Comments How the fabric is held between the presserfoot and the stitch plate plays an important role in the stitch formation. Refer to all presser feet. See Operating Manual. Feed dog Requirements The top side of the feed dog must not be damaged in any way, e. broken teeth etc. It should be free from fluff and pieces of thread. Compare with Operating Manual: ”Care of the machine”. Action The faulty dog should be exchanged. Remove the stitch plate. Undo the screws and replace the feed dog. As regards to the settings of the feed dog (P. 34-35). [...]..

Téléchargez votre notice ! Téléchargement gratuit et sans inscription de tous types de documents pour mieux utiliser votre machine à coudre HUSQVARNA 1200 : mode d'emploi, notice d'utilisation, manuel d'instruction. Cette notice a été ajoutée le Mardi 7 Juillet 2018.

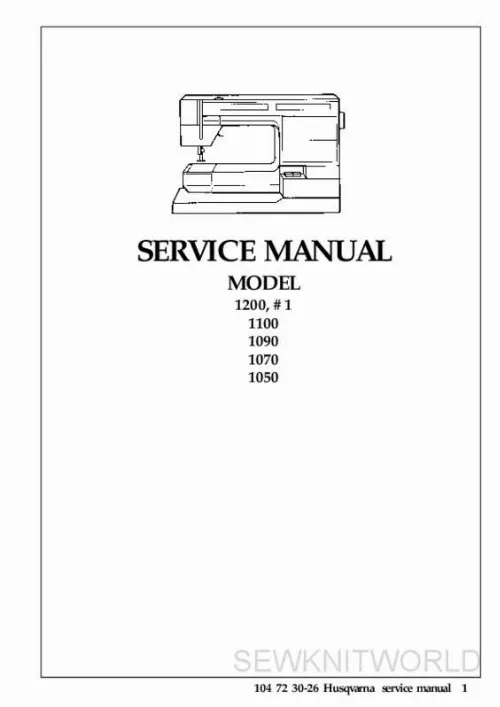
Le mode d'emploi HUSQVARNA 1200 vous rend service

Après plusieurs mois sans avoir utiliser votre machine à coudre, celle ci ne démarre plus. Vous souhaitez obtenir une documentation détaillée en français. Vous vous demandez comment changer l'aiguille de votre machine à coudre. Le fil supérieur de votre machine à coudre se casse régulièrement et vous vous demandez comment changer la pression. La canette de votre machine à coudre, qui est effectivement une des pièces détachées d'électroménager les plus fragiles, est cassée. Veuillez vous référer au mode d'emploi de votre HUSQVARNA 1200 pour changer la canette. Vous souhaitez nous contacter par mail ou par téléphone au sujet de votre machine à coudre. La pédale de votre machine à coudre ne fonctionne plus. Vous souhaitez changer la lampe de votre machine à coudre. Les points ne se font plus lorsque vous utilisez votre machine à coudre. Vous vous demandez comment démonter votre machine à coudre. Vous souhaitez régler la tension de votre machine à coudre. Veuillez vous référer au schéma de montage de votre HUSQVARNA 1200 pour effectuer certains réglages.

Liens commerciaux