Pièces détachées CANDY CH 642 XK

* Prix indicatif de vente, le prix exact sera affiché après que vous ayez saisi la référence de votre appareil.


Extrait du mode d'emploi CANDY CH 642 XK
Les instructions détaillées pour l'utilisation figurent dans le Guide de l'utilisateur.
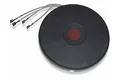
• Open the cover in the following sequence: 1 2 3 3x2,5 Cable HO5V2V2F 4x1,5 Cable HO5V2V2F Monophase 220-240 V~ 4x1,5 Two phases 220-240 V2~ Three phases 220-240 V3~ Three phases 380-415 V2N~ Ph = Phase N = Neutral T = Earth • unscrew the cable clamp "1", • find the two tabs located on the sides, • put the blade of a flat screw-driver in front of each tab "2" e "3", push in and press, • remove the cover. To release the power supplying cord. • remove the screws retaining the terminal block which contains the shunt bars and the conductors of the supply cord, • Pull out the supply cord. • Operations to be carried out to make a new connection : - Choose the power supply cable in accordance with the recommendations in the table. - Pass the power supply cable into the clamp. PRESENTATION • hilight zone : a metallic conductor strip is spread uniformly over the whole surface unit. It is effective within 3 seconds and is suitable for steady, homogeneous and also sustained cooking. The glass-ceramic hob benefits from greater heat output which is generated by the hilight cooking zones thereby accelerating the cooking process. Modifications to the design of the hob have not affected the capacity of the glass to withstand high temperatures, but they have improved controllability. With the "Sprinter" facility, reduced cooking times of up to 15% can be achieved, depending upon the method of cooking and the type of saucepans being used. SHUNT - Strip the end of each conductor of the supply cord on a 10 mm length, by taking in account the requested length of the cord for the connection to the terminal block. - According to the installation and with the help of shunt bars which you should have recovered in the first operation, fix the conductor as shown on the chart. - Fix the cover. - Screw the cable clamp. HOB COOKWARE ADVICE Using good quality cookware is critical for setting the best performance from your hob. Note: make sure the terminal board screws are tight. • Always use good quality cookware with perfectly flat and thick bases : using this type of cookware will prevent hot spots that cause food to stick. Thick metal pots and pans will provide an even distribution of heat. [...] Make sure the glass is protected. - fit the seal round the hob. - make sure that it is correctly fitted to avoid any leakage into the supporting cabinet. • Leave a gap of at least 5 cm between the appliance and the vertical sides of the adjacent furniture. • If, when installing the hob, the lower hob face is adjacent to an area normally accessible when handling or cleaning, fit a partition 1 cm below the base of the hob to avoid any risk of scorching or damage. ELECTRICAL CONNECTION "The installation must conform to the standard directives. " The manufacturer declines all responsibility for any damage that may be caused by unsuitable or unreasonable use. Warning: we cannot be held responsible for any incident or its consequences that may arise during the use of an appliance not linked to the earth, or linked to an earth whose continuity is defective. • Always check before any electrical operation, the supply tension shown on the electricity meter, the adjustment of the circuitbreaker, the continuity of the connection to earth to the installation and that the fuse is suitable. • The electrical connection to the installation should be made via a socket with a plug with earth, or via an omnipole cut-out switch. If the appliance has a socket outlet, it must be installed so that the socket outlet is accessible. • The yellow/green wire of the power supply cable must be connected to the earth of both power supply and appliance terminals. • Any queries regarding the power supply cord should be referred to After Sales Service or a qualified technician. 6 ATTENTION: should it be necessary to replace the supply cord, connect the wire in accordance with the following colours/codes: BLUE - NEUTRAL (N) BROWN - LIVE (L) YELLOW-GREEN - EARTH ( ) Connection to the terminals on the terminal block LAY OUT “1” Cable HO5V2V2F The hob is fitted with a power supply cord which allows it to be connected only to a power supply of 220-240 V between phases or between phase and neutral. • Connect to a socket. It is however possible to connect the hob to :. Three phase 220-240 V3~. Three phase 380-415 V2N~ To proceed to the new connection, you must adhere the following instructions. • Before making the connection, make sure that the installation is protected by a suitable fuse and that it is fitted with wires of a large enough section to supply the appliance normally. [...]..
Téléchargez votre notice ! Téléchargement gratuit et sans inscription de tous types de documents pour mieux utiliser votre plaque de cuisson CANDY CH 642 XK : mode d'emploi, notice d'utilisation, manuel d'instruction. Cette notice a été ajoutée le Jeudi 2 Février 2013. Si vous n'êtes pas certain de votre références, vous pouvez retrouvez toutes les autres notices pour la catégorie Plaque de cuisson Candy.

Envoyer vos modes d'emploi - Foire aux questions - Dernières recherches - Derniers ajouts - Sitemap - Contactez-nous - Conditions générales - Politique de cookies
Copyright - Tous droits réservés.
Les noms de marques cités appartiennent à leurs propriétaires respectifs.