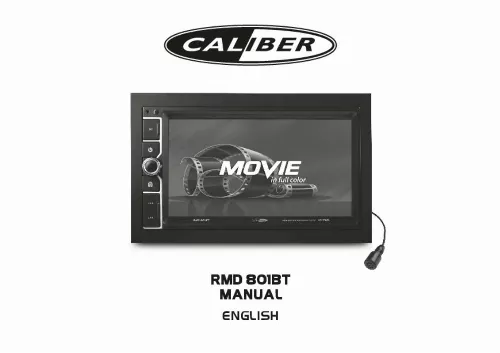
Notice CALIBER RMD801BT, CALIBER RMN801BT
Liens commerciaux


Le mode d'emploi CALIBER RMD801BT, CALIBER RMN801BT vous rend service
Le courant de la batterie de votre véhicule arrive bien jusqu’à votre poste autoradio et celui-ci est correctement branché. Seulement le voyant de la commande de mise en marche de votre appareil ne s'allume plus, cette dernière est inopérante. Le manuel de votre CALIBER RMD801BT vous indiquera de quelle manière réactiver les contacts du bouton de démarrage de votre poste radio. Vous venez de changer la batterie de votre camping car et depuis votre autoradio vous demande un mot de passe. Cependant, vous avez acheté votre véhicule d'occasion chez un concessionnaire, vous ne possédez donc pas ce mot de passe. Vous n'arrivez plus à connecter d'appareil en bluetooth sur votre poste autoradio, en effet celui-ci vous indique à chaque tentative de connexion que le mot de passe est incorrect. Vous apprendrez à paramétrer votre poste pour qu'il accepte d'établir une liaison avec vos autres dispositifs en consultant la notice de votre CALIBER RMD801BT.
Extrait du mode d'emploi CALIBER RMD801BT
Les instructions détaillées pour l'utilisation figurent dans le Guide de l'utilisateur.
IMPORTANT: Remove the two transport screws from the top fo the unit before installing. Remove the Old Unit from the Dashboard 1. Remove the outer trim frame. Insert the keys supplied with the old unit into both sides of the unit as shown in figure below until they click. Pull to remove the old unit from the dashboard. DO NOT DISCONNECT WIRES AT THIS TIME! DIN Front Mount Mark Polarity of the Speaker Wires Marking the polarity of the speaker wirers will make it easier to connect the existing speakers to your car radio. Consult wiring diagram of existing head unit before disconnecting any wires. If you are not positive of the polarity of the existing wires from the speakers to the head unit, install new wires. While the old unit is playing, disconnect the wires from one speaker. Take a length of masking tape and fold it around the wire so it forms a flag. On the masking tape mark the polarity of the speaker wires (+&-), as well as left or right, and front or rear. Double check that you marked the first speaker correctly by checking that the speaker wires are the same at the head unit. Repeat this procedure for all of the speakers. Mark the power, ground, and any other wires also. 4 MANUAL RMD 801BT INSTALLATION WARNING! Disconnect negative battery terminal from battery before starting installation. Consult the vehicle’s owner’s manual for proper instructions. NOTE: Mark the polarity of the existing speaker wires before disconnecting battery. NOTE: Remove the two transport screws from the top of the unit before installing. NOTE: Make sure there is enough space for the installation of this double-din unit. SUPPLIED TOOLS 5X12 5 RMD 8 0 1 BT MANUAL WIRING DIAGRAM DTV Antenna (optional) TV Antenna (optional) GPS Antenna (optional) Radio Antenna HDMI (optional) Reverse(purple-white) Parking (green) IPOD(optional) Steering 1 (brown) Steering 2A (white) Steering 2B (grey) Connector B 1. Battery 12V (+)/Yellow 5. Antenna power/Blue-White 6. Panel light/Orange-White(optional) 7. ACC+/Red 8. Ground/Black Connector A 1. Rear right speaker(+)/Purple 2. Rear right speaker(-)/Purple-Black 3. Front right speaker(+)/Grey 4. Front right speaker(-)/Grey-Black 5. Front left speaker(+)/White 6. Front left speaker(-)/White-Black 7. Rear left speaker(+)/Green 8. [...] 300mA 12V DC). If the car features a glass antenna, connect to the antenna booster power supply terminal. When an external power amp is being used with this system, do not connect the orange lead to the amp’s power terminal. Such connection could cause excessive current drain and a major malfunction. Refer to the relevant owner’s manual for details on connecting the power amp and other units, then make the connections correctly. Do not block any vents or heater panels, Blocking them will cause heat to build up and may result in fire. Make sure that the unit has a good chassis ground. A good ground connection will eliminate most electrical noise. A good chassis ground requires a tight connection to the vehicles metal chassis. The area around the ground connection should be clean, bare metal without rust, paint, plastic or dirt for a good electrical connection. If noise is still experienced when the motor of the vehicle accelerates, a choke should be placed in line with the power to the unit. The installation company will know what is required. When replacing the fuse(s) the replacement must be of the same amperage as shown on the fuse holder. Never replace a fuse with another of a different value. If the fuse blows again please contact your instsallation company. Double check that all wiring and connections are correct before re-connecting the battery and turning on the unit. After completing the installation and before operating the unit, reconnect the battery, then press the (RES) button with a pointed object, such as a ball-point pen to set to unit to it’s initial status. After pushing the button, wait a few seconds for the red light to flash. 3 RMD 8 0 1 BT INSTALLATION Tools for Installation MANUAL Use the 2 removal wrenches of the old unit to take out the old unit and place with this brand new car radio. The following tools and supplies may also be needed for the installation: Tools for Installation: Philips Screw-drivers /Machine Screws /Wire Stripper /Wire Cutter /Hammer /Pencil /Electrical Tape /Electric Drill Supplies for Installation: Machine Screws /Crimp Connectors /14 Gauge Wire for Power Connections /14-16 Gauge Speaker Wires The above are not supplied. Before you install Automotive audio equipment installations can be challenging even to the most experienced of installation technicians. [...]..
Téléchargez votre notice ! Téléchargement gratuit et sans inscription de tous types de documents pour mieux utiliser votre autoradio CALIBER RMD801BT : mode d'emploi, notice d'utilisation, manuel d'instruction. Cette notice a été ajoutée le Mardi 2 Février 2019.


